
Hello everyone.
With the recent launch of Organizations, Minnit now supports Single Sign On (SSO). We wanted to take the time to discuss this new feature in greater detail.
Single Sign On helps your users sign into the chat with their existing account details, without having to create a separate account. Their username, profile picture, email address, and nickname can all be pulled from your existing site and used within the chat. This will also keep their ranks, friends lists, and other information synced across devices.
We fully support both OAuth2 and SAML2 for Single Sign On.
If you’re using WordPress, this is all taken care of for you, so you don’t need to sweat the details of which type of SSO it’s using, or mess about with the configuration in detail.
Setting this up
If you don’t have an organization, create one here first.
Single Sign On requires you to be on the Community plan or higher to use it, but you can try it out for free if you select the Free plan and opt to use the trial.
If you’re using WordPress:
If you’d like to link your WordPress users with your organization, this couldn’t be any easier — our WordPress plugin takes care of all of it for you.
Simply install our WordPress plugin here.
Go to the settings page for the plugin (in the WordPress admin sidebar, click on Settings, and then Minnit Chat)
Under Single Sign On, change it from Disabled to Enabled and Save Changes.
Click on Sync Now and enter your organization URL in the text box below, and click Proceed.
This will take you to your organization settings page where you can set the provider details.
Check the Active? box to turn it on, add the sign up and login button text (and/or images) that you’d prefer, and click on Import WordPress SSO Data.
This will take you back to the WordPress plugin settings page, and Single Sign On will be fully enabled for all of your users.
Your organization registration and login page will now contain the option to Sign in with your provider.
Short video showing the setup process using our WordPress plugin
If you’re using something else:
If you’re using an external identity service such as Auth0, Okta or you have your own custom authorization server implemented for your website, the setup will be slightly more complex since you’ll need to manually enter details on both your website and your organization’s SSO settings to get it fully set up.
We’ve still made this really easy for you since you can test your integration and see what details your server returns.
Here’s an example of setting it up with Auth0:
First, create an Auth0 account here if you don’t already have one.
In the Auth0 dashboard, click on Applications in the sidebar, and then click on Create Application.
For the application type, choose Regular Web Applications and hit the create button.
This will take you to your application where you can view/configure the settings.
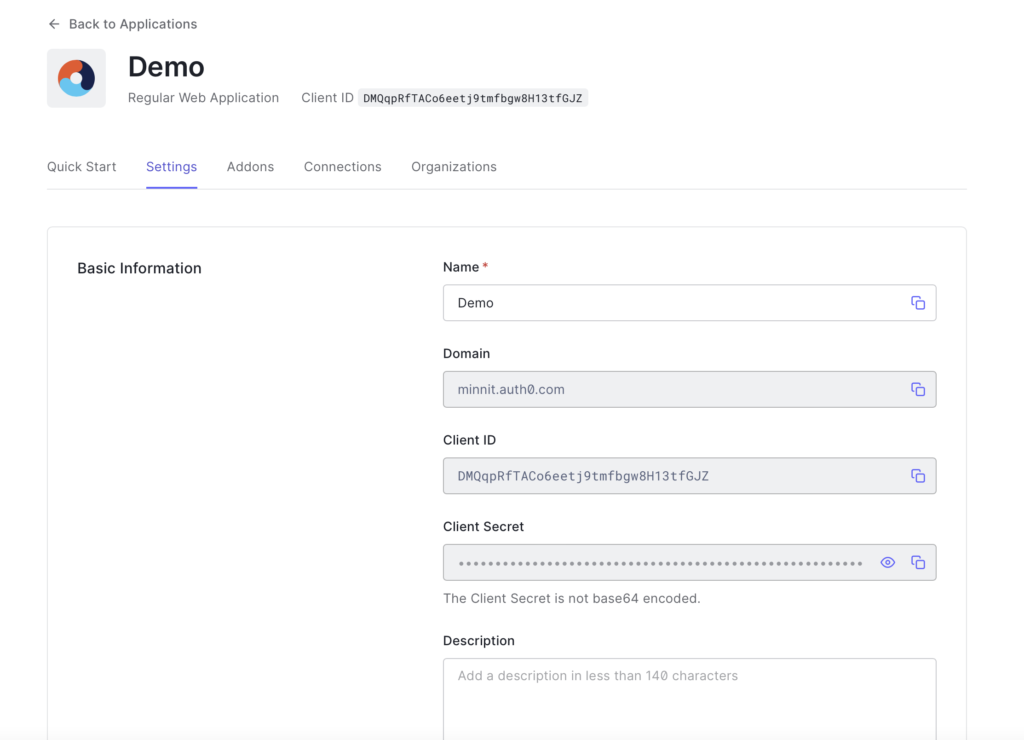
Click on Settings here — you’ll need to copy/paste a few values from here, and paste them into your organization’s SSO settings.
This should now take you to a page that looks like this:
Open a new tab and go to your organization’s settings page, and click on SSO.
Under one of your SSO providers select the Type as “OAuth2” and copy and paste the Client ID and Secret into your organization’s SSO settings.
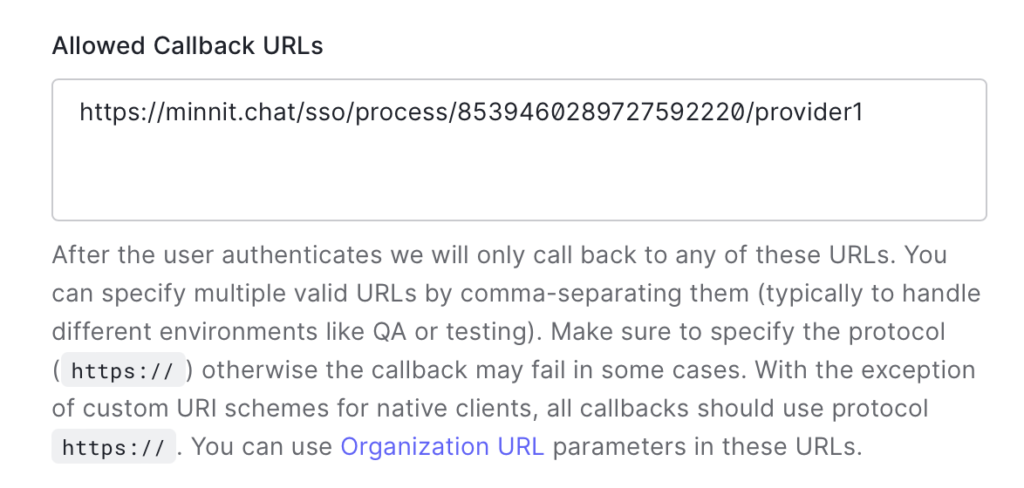
Click on the Copy button in your organization’s settings page under Authorized Redirect URI — you’ll need to add this to your Auth0 settings.
In the tab where you have the Auth0 settings page open, paste this under Allowed callback URLs.
It should look like this:
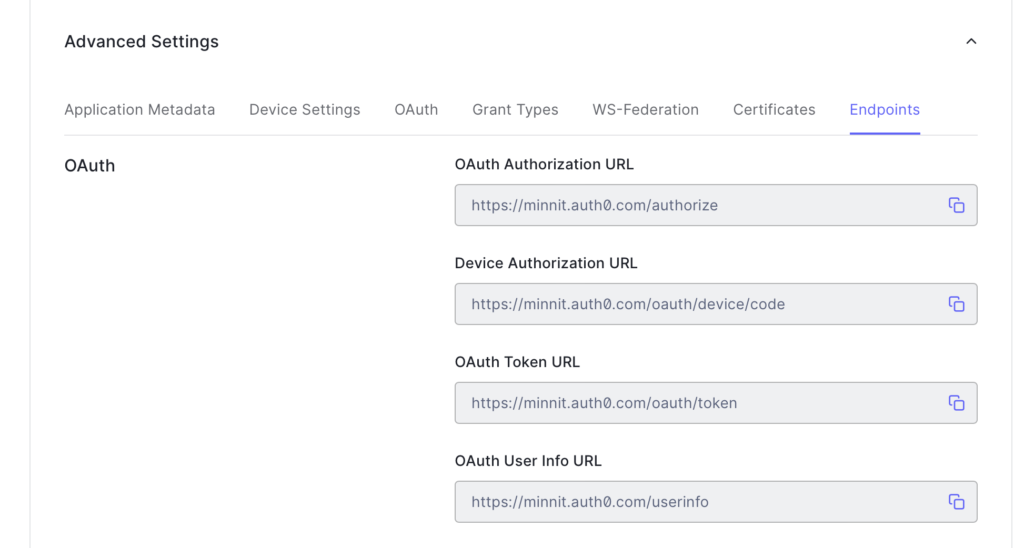
In the tab where you have the Auth0 settings page open, scroll all the way down to “Advanced Settings” and click on it to reveal the advanced settings.
Click on Endpoints to reveal the endpoint URLs.
The page should now look like this:
Hit the Save Changes button below so you can save the callback URL change you added previously.
Since we’re using OAuth2, you’ll need to copy and paste some of the OAuth URLs displayed above into your organization settings.
The terms used for these URLs slightly differ across all providers.
In this case, the following would apply:
OAuth Authorization URL = Authorize URL = https://minnit.auth0.com/authorize
OAuth Token URL = Access Token URL = https://minnit.auth0.com/oauth/token
OAuth User Info URL = Get User Info URL = https://minnit.auth0.com/userinfo
For Scope, enter “openid,profile,email”.
Your organization’s SSO settings should now look similar to this:

Now, click on the save button (bottom right hand corner) to save your organization settings.
You’re almost there — you just need to test your integration and add in a few values to decide what data to pull from Auth0.
Click on the Test Integration button.
Now, you’ll need to sign in with an account already registered in your Auth0 application, or sign up for a new one.
For the purposes of this Demo we’ll be using a Google account.
Once you sign in, you’ll be redirected and taken to a page showing the information returned by your identity provider (Auth0 in this case).
It should look like this:
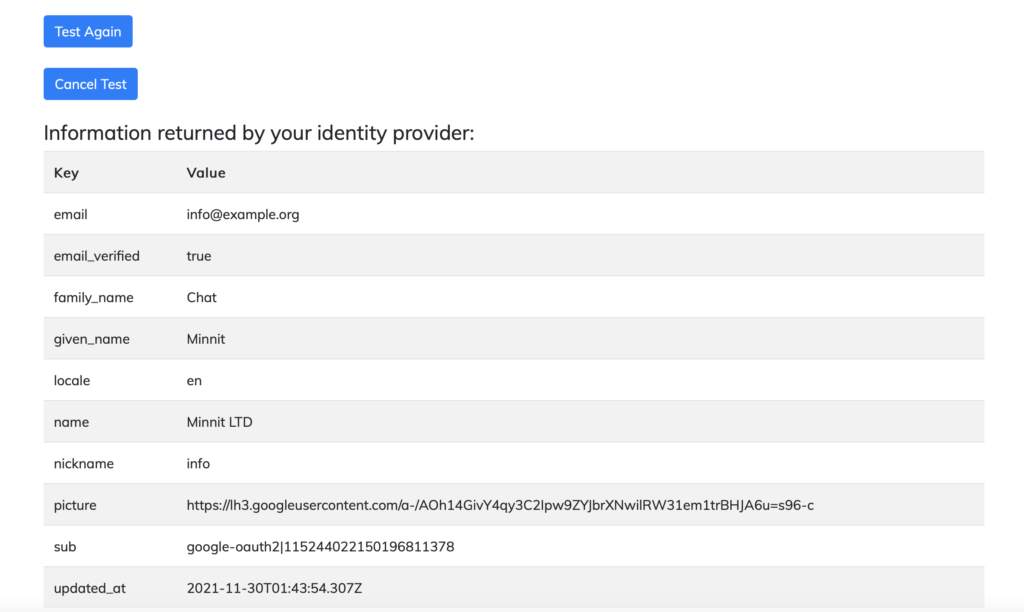
Now you have access to every key that your identity provider returns, and you’ll need to add them to your organization’s SSO settings.
In this case, the keys that would apply are:
Unique User Key = sub
Username Key = given_name
Nickname Key = name
Email Key = email
Email Verified Key = email_verified
Profile Picture Key = picture
With that, your organization’s SSO settings should look like this:
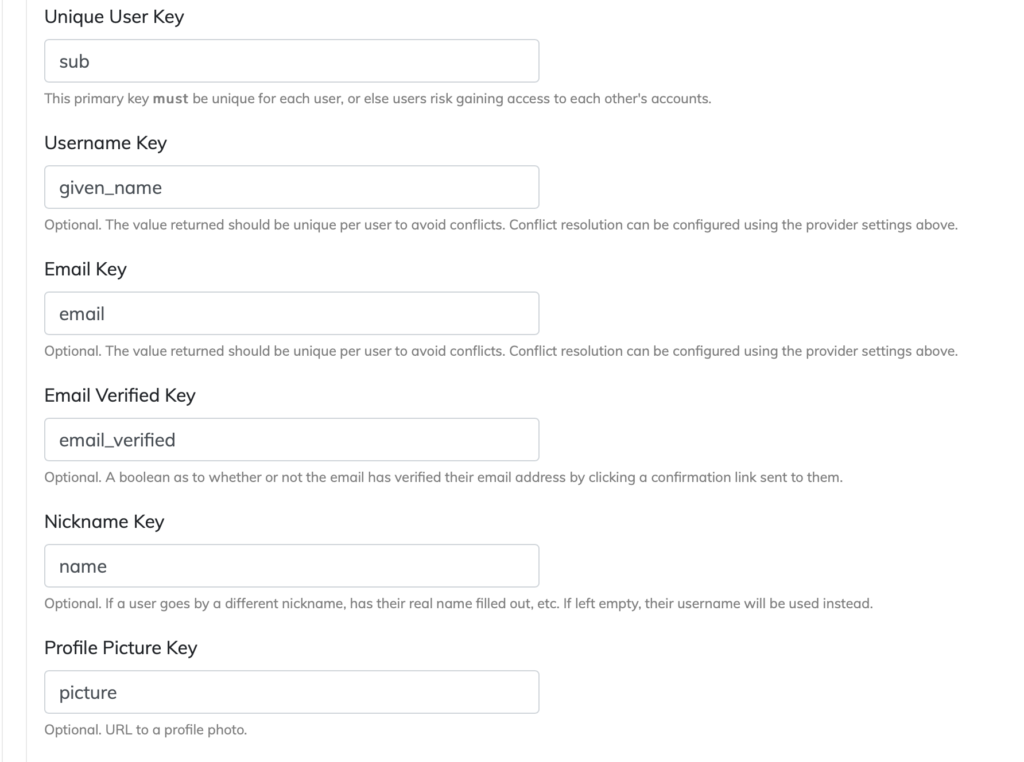
With the above values being set, any user who signs in using Auth0 will have their username, nickname, email and profile picture automatically populated.
Once you’ve added these to your organization settings, you just need to tick the Active? checkbox to enable this provider, and save your organization’s SSO settings again.
That’s it! You’ve fully set up Single Sign On using Auth0.
On your organization registration and login page, users will see the option to sign in using Auth0.
If you need additional details, our documentation covers all there is to know about Single Sign On and will help you get it up and running in no time.