Setting up zero-click Single Sign-On (SSO) between your Wix website and Minnit Chat allows users to join the conversation instantly—without creating a new account or clicking a login button.
This seamless experience keeps users engaged, improves retention, and ensures a smooth transition between your site and the embedded chat.
In this article, we’ll walk through how to integrate zero-click SSO with Minnit Chat using Wix’s tools.
This is supported using the Wix Members Area app only.
To get started, you’ll need make changes to your organization’s SSO settings to enable Zero-Click SSO.
To access the organization SSO settings page, go to your organization’s homepage and click on Organization Settings in the navigation bar and click on SSO.
Once there, change the type for one of your providers to Zero-Click, check the box by Active to turn it on, and save changes.
You’ll see an encryption key here, which you’ll need to pass user data to the chat.
Once that’s done, go to https://manage.wix.com/dashboard and click on Edit Site.
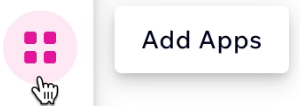
If you don’t have the Wix Members Area app installed yet, you can install it within the Wix site editor under Add Apps:
Once the Wix Members Area app is installed and enabled, click on Dev Mode up top, and click on “Turn on Dev Mode” to enable it.
Now you’ll need to copy and paste some code.
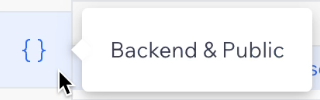
Click on the {} Backend & Public icon in the sidebar:
Click on the + button to add a file.
Set the file’s name to minnitzeroclicksso.jsw.
Copy and paste the following code into the code editor, replacing any existing code:
const crypto = require('crypto');

const encryptionKey = "INSERT_YOUR_ENCRYPTION_KEY_HERE";

export async function minnitZeroClickSSOEncrypt(textToEncrypt) {
  const iv = crypto.randomBytes(12);
  const cipher = crypto.createCipheriv("aes-256-gcm", encryptionKey, iv);
  cipher.setAutoPadding(false);
  let enc = cipher.update(textToEncrypt, 'utf8', 'base64');
  enc += cipher.final('base64');
  let encBuffer = Buffer.from(enc, "base64");
  encBuffer = Buffer.concat([iv, encBuffer, cipher.getAuthTag()]);
  return encBuffer.toString("base64");
}
Make sure to replace INSERT_YOUR_ENCRYPTION_KEY_HERE with your encryption key.
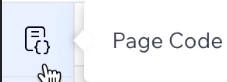
Once that’s done, click on Page Code Click on the {} Backend & Public icon in the sidebar:
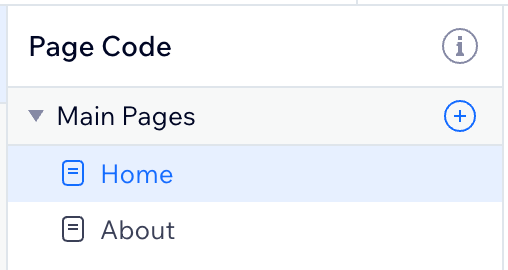
Now you’ll need to select the page where you’d like the chat to be embedded.
In our example we’re using the Home page:
Copy and paste the code into the code editor, replacing any existing code:
import { currentMember } from 'wix-members';
import { minnitZeroClickSSOEncrypt } from 'backend/minnitzeroclicksso';

$w.onReady(async function () {
    const iframeUrl = "INSERT_YOUR_CHAT_URL_HERE";
    const member = await currentMember.getMember();

    if (member) {
        let encryptedSSOToken = await minnitZeroClickSSOEncrypt(JSON.stringify({"userid": member._id, "username": member._id, "nickname": member.profile.nickname, "profile_picture_url": member.profile.profilePhoto.url, "email": member.loginEmail, "max_valid_ts": Math.floor(Date.now() / 1000) + 86400}));
        $w("#minnitchatiframe").src = iframeUrl + "&ssotoken=" + encryptedSSOToken;
    } else {
        $w("#minnitchatiframe").src = iframeUrl;
    }
});
Here, you’ll need to replace INSERT_YOUR_CHAT_URL_HERE with your chat URL from the embed page.
To get your chat URL, go to the embed page for your chat, and click on “Add Minnit to Wix”.
Then, customize your embed as needed, e.g. choose a different default chat language or theme.
Once that’s done, look at the embed code and you’ll see something like this: data-chatname="https://organizations.minnit.chat/123456/Main?embed".
Your chat URL in the above example would be: https://organizations.minnit.chat/123456/Main?embed, so copy and paste it there.
Once all of this is done, you’ll need to insert a new element in Wix onto the page containing the code for the chat.
- Click Add Elements on the left side of the editor.
- Click Embed Code.
- Click Popular Embeds.
- Click Embed HTML
- Click on Code
- Insert the following code:
<iframe style="border:none; width:90%; height:500px; max-height:90vh;" allowTransparency="true"></iframe>- Scroll down and click on Update, and then click on X to close it.
- With the embed element selected, you’ll see the ID of the element next to the page code below:
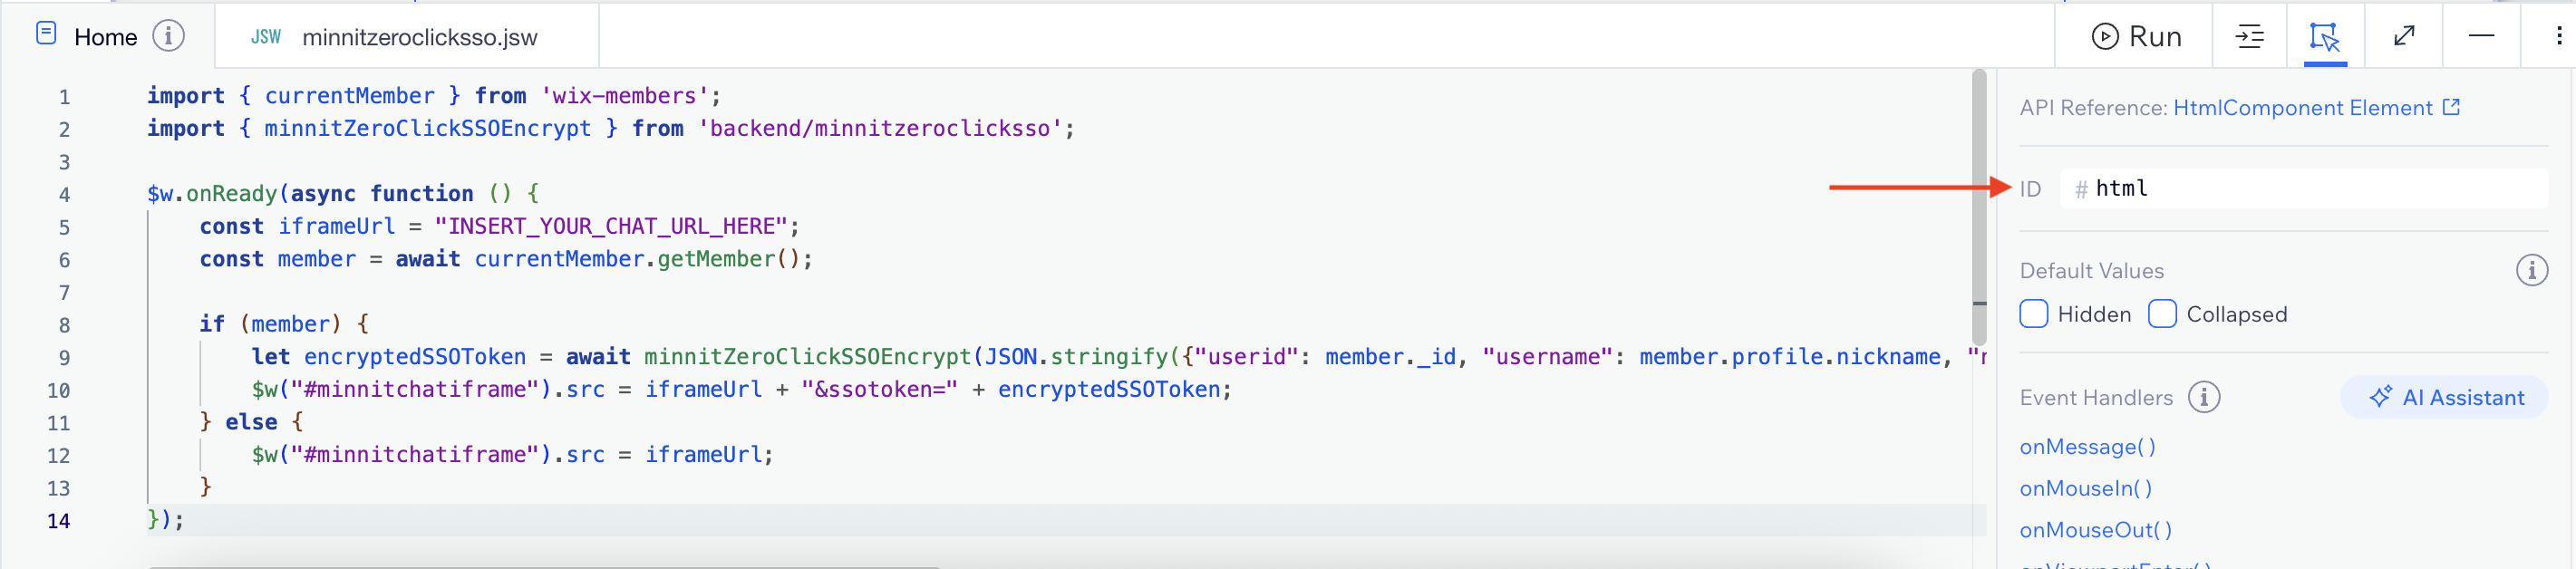
Change the ID to minnitchatiframe.
Once that’s done, hit Publish.
Now when anyone visits your Wix website and is logged in, they should be automatically logged into the chat.
Wix usernames
Note: Wix does not support usernames.
The data passed to the chat uses the user’s ID as their username, as usernames are required to be unique.
We recommend disabling registered names from displaying in the chat under Personalization in your chat settings. Nicknames will be displayed instead.
You can also find a copy of this guide in our documentation here.